Connecting to the MongoDB Database
Databases are essential for storing and managing data in any application. Whether you are building a web app, mobile app, or any other software, a database helps keep your data organized and accessible. MongoDB is a popular NoSQL database that stores data in a flexible, JSON-like format, making it easy to work with.
Step 1: Creating a Database on MongoDB
To create a database in MongoDB, follow these steps:
- Go to MongoDB Atlas – Visit MongoDB Atlas and sign up for a free account if you don’t already have one.
- Create a New Project – After logging in, click on “Create a Project” and provide a name for your project.
- Set Up a Cluster – Click on “Build a Cluster” and choose the free-tier option (or a paid plan if required).
- Choose a Cloud Provider & Region – Select the preferred cloud provider (AWS, GCP, or Azure) and a region close to your location for better performance.
- Create the Cluster – Click “Create Cluster” and wait for the setup to complete, which may take a few minutes.
Step 2: Creating User Authentication for Database Access
To keep your database secure, you need to create a user with specific permissions:
- Go to Database Access – In the MongoDB Atlas dashboard, navigate to the “Database Access” tab.
- Create a New Database User – Click “Add New Database User” and set up a username and password.
- Choose Authentication Method – Select “SCRAM” as the authentication method (default and recommended for security).
- Assign Role – Choose the appropriate role for the user (e.g., “Read and Write” for basic access or “Admin” for full control).
- Click Create – Once done, save the credentials as they will be needed for the connection.
Step 3: Getting the Connection String
To connect your application to the MongoDB database, follow these steps:
- Go to Clusters – In the MongoDB Atlas dashboard, open your created cluster.
- Click “Connect” – You will see multiple connection options.
- Choose “Connect Your Application” – This will generate a connection string.
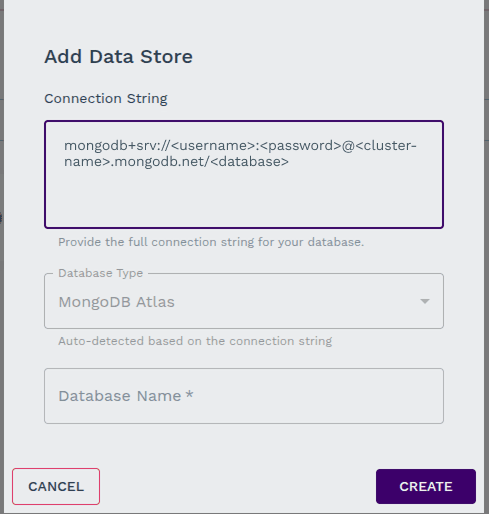
- Copy the Connection String – Replace
<username>and<password>with the credentials you created in Step 2. - Whitelist Your IP – Go to “Network Access,” click “Add IP Address,” and allow your current IP or all IPs (
0.0.0.0/0) for open access.
Step 4: Use the Connection String in Your Synngular Project:
You just Need to paste the connection string in the required input field.
By following these steps, even non-technical users can set up a secure MongoDB database and connect it to their applications with ease.
Last updated on