Connecting to the MongoDB Database
This guide will walk you through the process of setting up a MongoDB database on MongoDB Atlas and obtaining the necessary connection string to connect to it. No prior technical knowledge is required—just follow the steps carefully!
Step 1: Create a Database on MongoDB Atlas
MongoDB Atlas is a cloud-based database service that allows you to create and manage databases easily. Follow these steps to set up your database:
- Go to MongoDB Atlas – Open your browser and navigate to MongoDB Atlas .
- Sign Up / Log In – If you don’t already have an account, sign up by entering your details. If you have an account, simply log in.
- Create a New Project – Click on “New Project” and give your project a name.
- Create a Cluster – Click on “Build a Cluster” and choose a cluster tier. The free tier (M0 Sandbox) is sufficient for getting started.
- Select a Cloud Provider and Region – Choose a cloud provider (AWS, Google Cloud, or Azure) and a region closest to you for better performance.
- Cluster Name – Give your cluster a meaningful name (e.g., “MyFirstCluster”).
- Create Cluster – Click “Create Cluster” and wait for it to be provisioned (this may take a few minutes).
Step 2: Create a Database User
To securely access your database, you need to create a user with credentials:
- Go to Database Access – In MongoDB Atlas, navigate to “Database Access” from the left-hand menu.
- Add a New Database User – Click on “Add New Database User.”
- Select Authentication Method – Choose “Password” as the authentication method.
- Set Username and Password – Enter a unique username and a strong password (store this securely as it will be needed for connection).
- Set User Privileges – Choose “Read and Write to Any Database” to allow full access to the database.
- Click “Add User” – The user will now be created.
Step 3: Get the Connection String
The connection string is required to connect your application to the database. Follow these steps to obtain it:
- Go to Database Clusters – Navigate to the “Clusters” section in MongoDB Atlas.
- Click on “Connect” – Find your cluster and click the “Connect” button.
- Choose a Connection Method – Select “Connect Your Application.”
- Copy the Connection String – You will see a connection string similar to this:
mongodb+srv://<username>:<password>@cluster0.mongodb.net/<dbname>?retryWrites=true&w=majority - Replace Placeholder Values:
<username>– Enter the username you created.<password>– Enter the password for your database user.<dbname>– Enter the name of the database you want to connect to.
Step 4: Allow Network Access
To connect to your database from anywhere, you need to allow access from your device:
- Go to Network Access – In MongoDB Atlas, navigate to “Network Access.”
- Add IP Address – Click “Add IP Address.”
- Allow Access from Anywhere – Choose “Allow Access from Anywhere” (or enter a specific IP address for security).
- Click Confirm – This ensures your application can connect to the database.
Step 5: Test the Connection
You can test the connection using MongoDB Compass or a simple script:
Using MongoDB Compass:
- Download and install MongoDB Compass .
- Open Compass and paste the connection string.
- Click “Connect” to access your database.
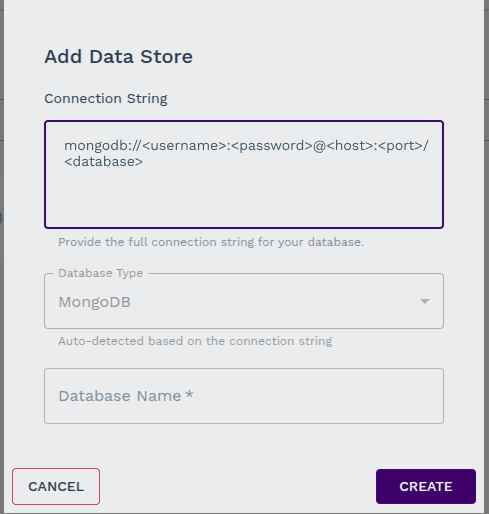
Use the Connection String in Your Synngular Project:
You just Need to paste the connection string in the required input field.
Final Thoughts
You have now successfully set up a MongoDB Atlas database and obtained the necessary connection string! You can use this database with your applications to store and retrieve data securely.
If you have any questions, refer to the official MongoDB Atlas Documentation for further guidance.