Deploying Your Project
Once you have completed all tasks, it’s time to deploy your project. Follow these steps to ensure a successful deployment.
Step 1: Navigate to the Deployment Section
- Open your project and go to the General tab.
- Locate the section named “Deploy Project”.
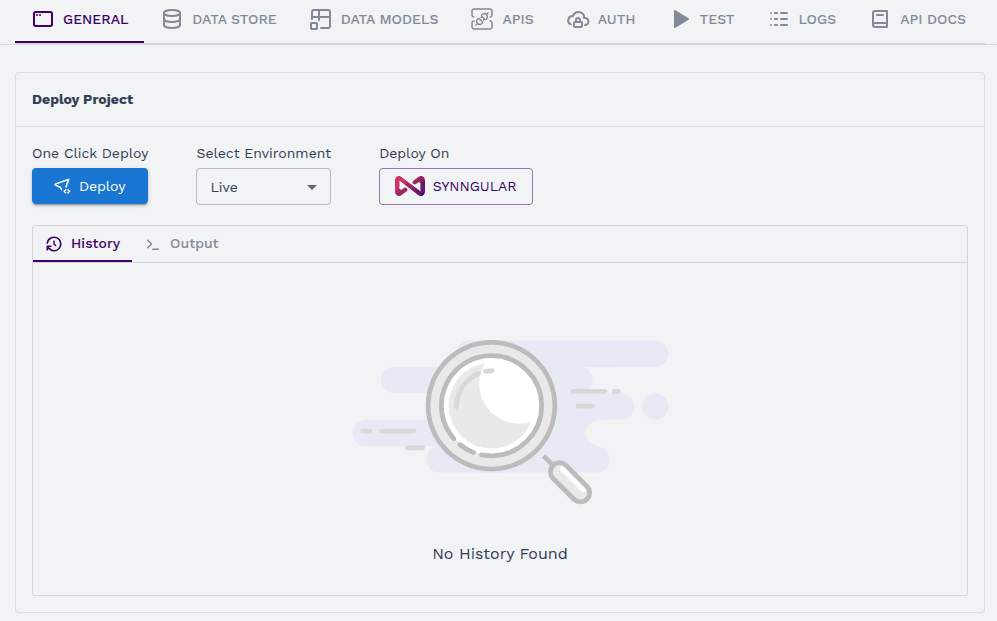
Step 2: Configure Deployment Settings
Before deploying, configure the necessary settings:
-
Select Environment – Choose the appropriate environment from the dropdown:
- Live – For production use.
- Dev – For development and testing purposes.
-
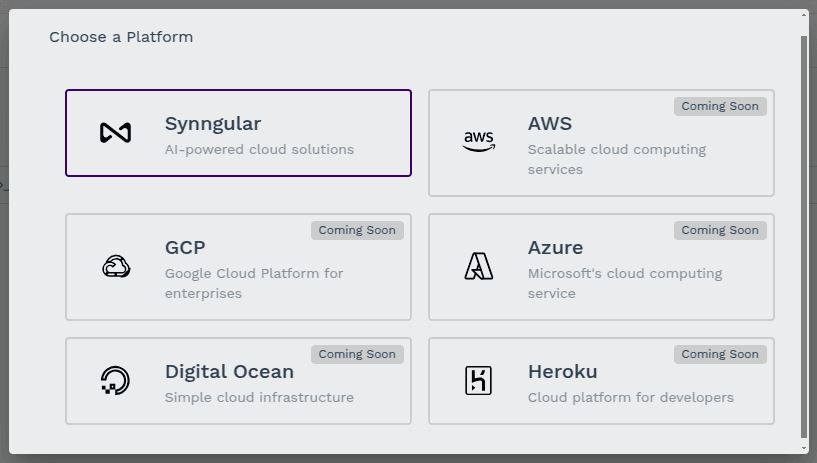
Choose a Deployment Platform – Click “Deploy on”, and a popup window will appear where you can select one of the available platforms for deployment:
- Synngular (default platform)
- AWS (Amazon Web Services)
- GCP (Google Cloud Platform)
- Azure (Microsoft Azure)
- Digital Ocean
- Heroku
Step 3: Deploy the Project
Once all configurations are set:
- Click the “Deploy” button to initiate deployment.
- The system will process the deployment, and you will see real-time updates.
Step 4: Verify Deployment
- After the deployment is complete, a section will be available to check the output and status of your deployment.
- Ensure everything is working correctly before proceeding further.
By following these steps, you can successfully deploy your project and make it available for use.
Last updated on